Wednesday, November 16, 2011

VPN Setup in Windows XP

Configure VPN Connection Introduction on Windows XP or Windows 2000
Posted by pakistan It Intl.Posted in Setup VPN Connection
Tags: , , , ,
In this article we will learn how to configure a connection to a virtual private network (VPN) using Windows XP. This article will show you how to create a new VPN connection using Microsoft Windows XP. By creating an encryption tunnel through the Internet, data can be passed safely.
Configure a VPN with Windows XP
If you want to configure a VPN connection from a Windows XP client computer you only need what comes with the Operating System itself, it’s all built right in. To set up a connection to a VPN, do the following:
1. In Control Panel, double click Network Connections
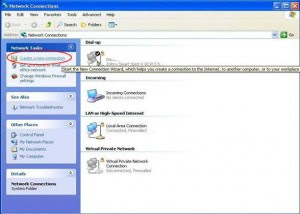
1. In Control Panel, double click Network Connections 2. Click Create a new connection in the Network Tasks task pad
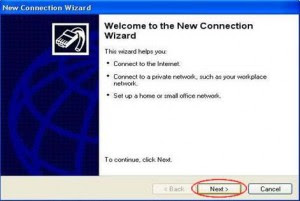


2. Click Next
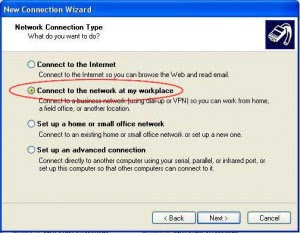


3. Click Connect to the network at my workplace, and then click Next
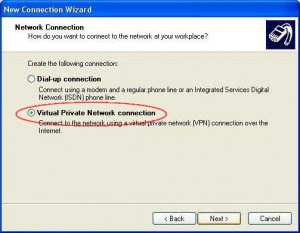


4. Click Virtual Private Network connection, and then click Next


5. If you are prompted, you need to select whether you will use a dialup connection or if you have a dedicated connection to the Internet either via Cable, DSL, T1, Satellite, etc. Click Next


6. Type a host name, IP or any other description you would like to appear in the Network Connections area. You can change this later if you want. Click Next 7. Type IP address of our VPN server that we provide to you. Click Next
Connecting to VPN server
Now that you have your VPN client all set up and ready, the next step is to attempt a connection to VPN server. To use the connection follow these simple steps. To open the client again, go back to the Network Connections dialog box.
1. One you are in the Network Connection dialog box, double-click, or right click and select “Connect” from the menu
2. Type your user name and password, and then click Connect.
3. To disconnect from a VPN connection, right-click the icon for the connection, and then click “Disconnect”

VPN Setup In Windows Vista

Configure VPN Connection Introduction on Windows Vista
Posted by pakistan It Intl.Posted in Setup VPN Connection
Tags: , , ,
Setting up VPN connection access under Windows Vista is simple. The following instructions go step–by–step through the creation process.

Step17. Then click on the Provide VPN entry and click “Connect”.


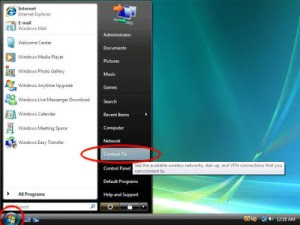
Step16. To connect to Provide VPN, go to the Start button and click “Connect To”.


Step15. At the Pop Up window Click on "Yes"


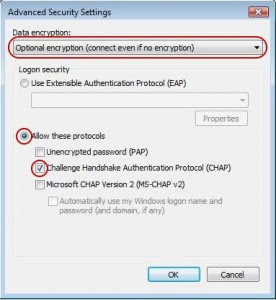
Step14. Make sure that the Data encryption section is set to "Optional encryption".


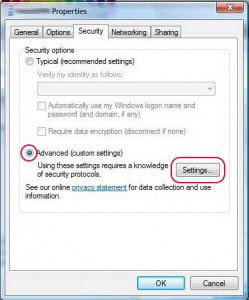
Step13. Make sure the security tab has the same settings as here. Then click on "Setting" button.


Step12. click the “Security” tab, which is highlighted in red.


Step11. In the “Connect to a network” screen, you should see the Provide VPN connection that we set just up. Right–click on the Provide VPN connection document (circled in red), and choose “Properties” (circled in green) from the menu.


Step10. click on “Connect to a network” again.


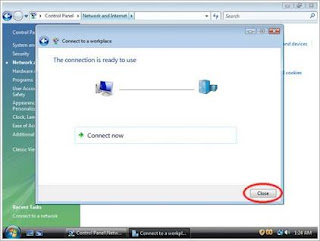
Step09. You should see this screen next. Click the “Close” button to return to the “Network and Internet” screen.

VPN Setup In Windows 7

Configure VPN Connection Introduction on Windows Seven
Posted by pakistan It Intl.Posted in Setup VPN Connection
Tags: , , ,
Setting up VPN connection access under Windows Seven is simple. The following instructions go step–by–step through the creation process.


Step01. First, click on the Start button and click “Control Panels”. This opens up the “Control Panel Home”.

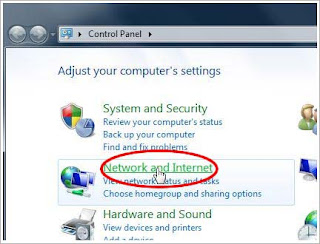
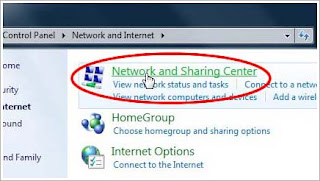
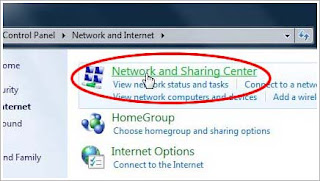
Step02. Next, click on the “Network and Internet” control panel, which is circled in red below.

Step03. Next, click on “Connect to a network”.

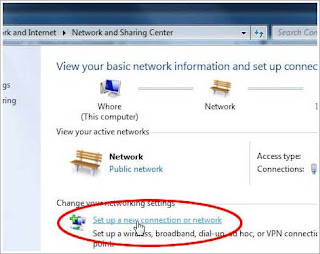
Step04. The next screen may not look quite like this if you have networks already defined. In any case, click on “Set up a connection or Network”.

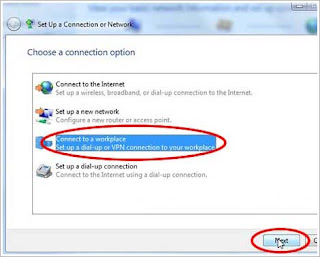
Step05. On the next screen, click on “Connect to a workplace” then click “Next”.

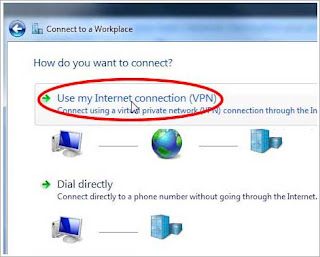
Step06. Next click “Use my Internet connection (VPN)”. If you are asked if you would like to use an existing connection choose 'No, create a new connection' and click 'Next'.

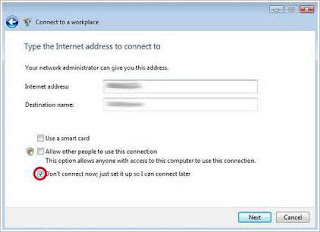
Step07. Now, enter the server information. In the text box labeled ‘Internet address’ type IP address of our VPN server that we provide to you. In the text box labeled ‘Destination name’ type ‘Provide VPN.com’. This is the name of the connection, and will show up in the “Connect to a network” screen when we’re done. Lastly, make sure that the checkbox labeled “Don't connect now; just set it up so I can connect later” is checked. Then click the “Next” button.

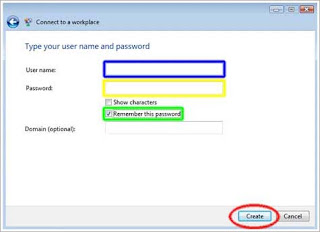
Step08. In this screen, enter your Provide VPN username and password. In the text box labeled “User name:” (highlighted in blue), enter your Provide VPN username. In the text box labeled “Password:” (highlighted in yellow), enter your Provide VPN password. Optionally, check the “Remember this password” checkbox (highlighted in green) and you won’t have to enter your password when you connect to Provide VPN. Then, click the ”Create” button.

Step09. You should see this screen next. Click the “Close” button to return to the “Network and Internet” screen.

Step10. Now click on “Connect to a network” again.